In this third post of my series about how I created a small visual novel with Ink and Godot, I’m diving into visual novel design. This comprises a few different things, such as coming up with a compelling narrative suitable for a game jam, and then my pipeline for illustrating characters and backgrounds. (Part two and Part one of my series are here).
What You’ll Learn in This Post
- How I came up with the story for ‘Something by the River’
- What my process is for visual novel design in terms of creating characters and backgrounds
- General tips for creating interfaces using Figma
- Exporting graphics for use in your game
Developing the story for my short visual novel
Because I set myself a time limit of a maximum of two weeks, I knew from the beginning that I would have to create a story that could be told quickly. I have published a number of short stories and flash fiction in the past, and one of my main takeaways from writing those stories was that short stories (I’m talking less than 10k words) are more about engulfing the reader inside a moment or an idea than taking them through a complete beginning, middle, and end.
Something by the River is a story that takes place within my existing Z-Verse series, which meant I could lean on a lot of worldbuilding that had already been done in prior entries. I will note, however, that no previous knowledge of Z-Verse is required to read this VN. What it meant, however, was that I already had a setting straight out of the box, as well as a supporting character in the form of Xa-Kol. Readers of my stories will recognise her as one of the major protagonists of my series.
I decided to keep the story contained within a single conversation. This provides a lot more creativity than it would seem on the surface.
Brainstorming a narrative for a visual novel
A single conversation can evolve in many unexpected ways. It could be:
- An argument
- A reconciliation
- A confession
- A humorous anecdote
And the characters involved in the conversation also impact things. They could be sympathetic, confrontational, disinterested, or they could have secrets of their own. Something by the River is an interrogation, but not a typical one. Of course, you’ll have to play it to find out the secret.0
My process for creating characters and backgrounds for visual novel design
3D is a major part of my illustration process. Typically, illustrations for all my stories combine 3D renders with digital and matte painting. If required, I sketch my characters or scenes to try and get a feel for them, before moving on to Maya, Z-Brush, and Substance Painter. Maya is used for modelling and rigging, Z-Brush is used for high-poly sculpting, and Substance Painter is for baking textures.


I get questions from time to time about this process and why I take this route, given that I want to make 2D games and I focus on still renders. The reasons are two-fold. First, I like to have the flexibility of being able to make animations of my characters, which means 3D is a good fit. The other reason is that once a character or environment is made in 3D, it can be re-used again and again in various different ways.
The flexibility of using 3D as part of an illustration pipeline
I can pose characters any way I like, swap their outfits, switch up lighting, and drop them into different scenes. I can chuck my characters into Unreal Engine and have them run around a grey box environment! While 3D is not for every pipeline, and is certainly not for every artist, I personally really like the process of creating a character in 3D and the control and flexibility it provides.
Xa-Kol already had a model, as did her office, so for this game I modelled an environment for the main scene (incredibly simple), and I also modelled our mysterious main character. Like Xa-Kol, The Stranger is a Zurxok. Unlike most of his kind, he doesn’t wear a mask, though he is bathed in shadow much of the time.
Like all of my characters, I rigged him using Advanced Skeleton, an invaluable auto-rigger that truly saves time when rigging humanoid characters. Now that he has been modelled, I expect this mysterious creature to appear again in Z-Verse…someday…
General tips for creating interfaces
UI is a topic I’m very close to, given that I’ve spent years designing them for websites, apps, and games. Like with everything else, there are trends in UI, but I would say for visual novels, a user interface should both be accessible and reflect the art direction of everything else. I think UI design is an unsung hero; it can really make or break the user experience. In fact, I’ve got so many opinions about UI and UX that I need to save them for another post.
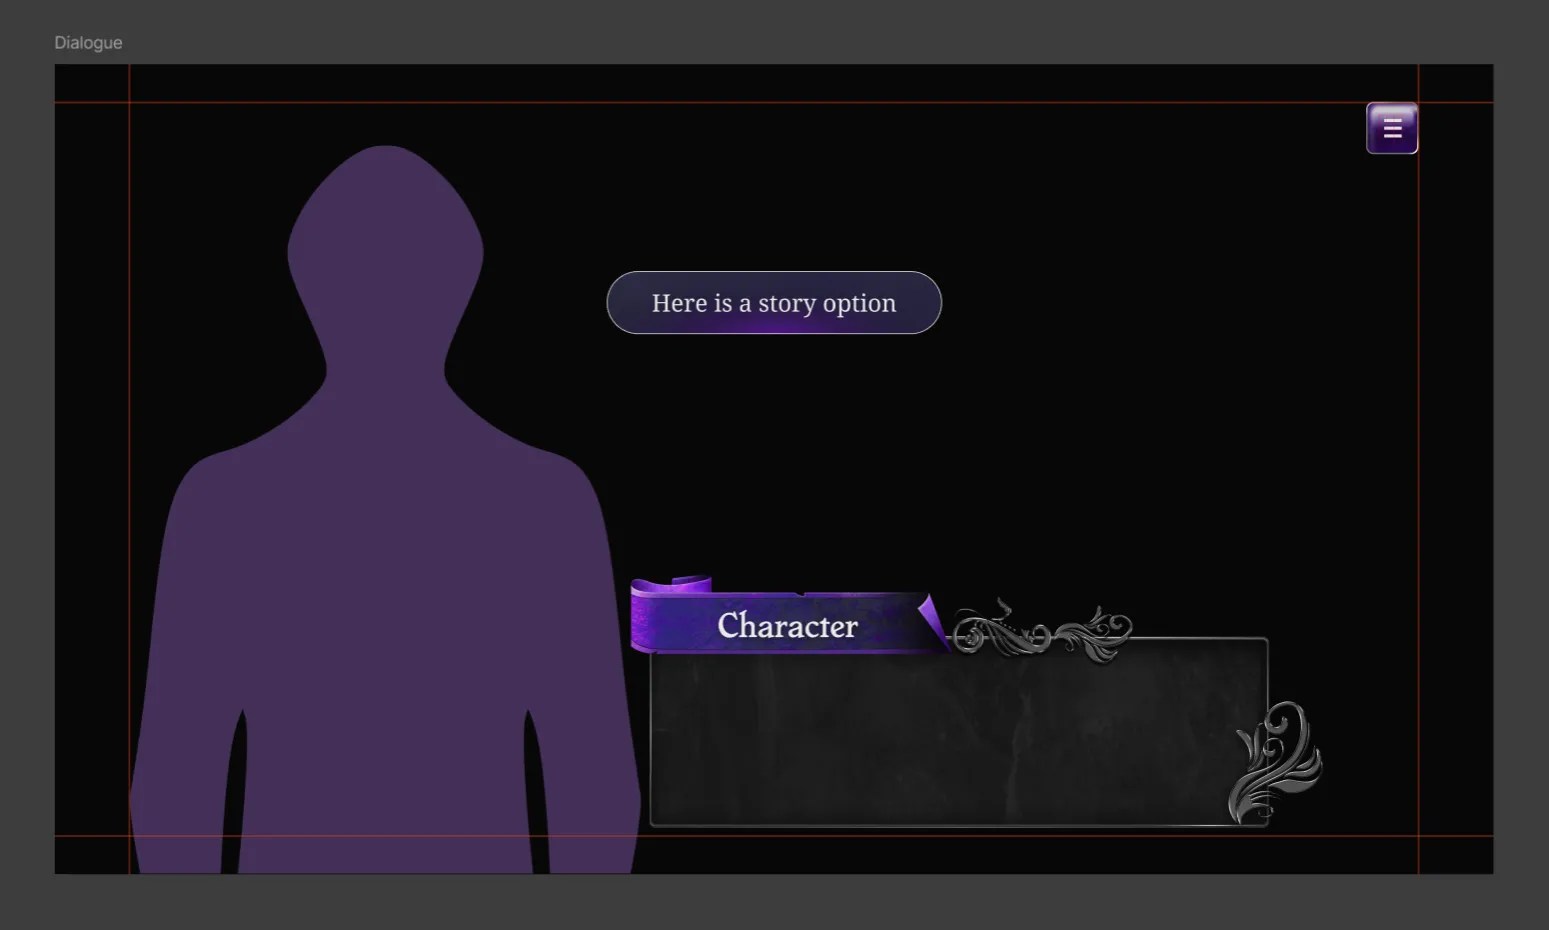
For visual novels, generally there is an expected layout, which makes planning for them less of an unknown. You’ll need a character portrait, a dialogue box, and possibly controls for rewinding or fast-forwarding through a script. My game jam doesn’t feature those (yet), but they are common in VNs.
Creating interfaces and component libraries in Figma for visual novels design
For designing interfaces, some use Photoshop, others use Adobe Illustrator, but in my experience in the industry, tools like Figma are the norm. For digital design, Figma is the program I most commonly use.
There are a few reasons. First, Figma is developed for teams, which means that a group of designers can converge on design files and collaborate. Figma is cloud-native, which means your designs are accessible from any device. Importantly, Figma allows for wireframing and prototyping, so you can test your UIs.

You can create libraries of components, along with variables (like button states). This means that not only can you design your interfaces, but you can actually step through them. When designing for clients, it means we can take them on a full tour of what their app or game might look and feel like long before we start putting things in-engine.
Designing UIs using both vector and raster graphics
In UI design, I’ve observed a strong emphasis on vector graphics, perfect for their sharp, clean lines. Vectors can be resized to infinity with no loss of quality. If you’re creating a more minimal or clean UI, then look no further than vectors.
But let’s say you want to create a more elaborate user interface, akin to those bold and beautiful interfaces we see in such games as Diablo or Path of Exile.
While I imagine those interfaces are laid out in a program like Figma, their individual components (like health or weapon bars) might be digitally created in Photoshop or even rendered out from 3D software.
The advantage of this is that it allows for finely detailed interfaces that aren’t practical to create in vector software. I have adopted a similar approach in my upcoming game, Gemseeker, where I’ve combined the use of 3D renders to create a stylish UI that I still arranged in Figma.
Something by the River doesn’t feature the same elaborate UI as Gemseeker does, but one trick I’ll share is that in Figma, you can apply a texture as a fill. Custom textures, in combination with gradients and layer effects, can help you create beautiful interfaces that look as if they were digitally painted, while retaining the advantages of designing within Figma.
Exporting your artwork
Artwork should be exported as either PNG or WebP format. My recommendation is definitely to go for WebP. This format supports transparency, like PNG, but offers smaller file sizes. We want to optimise our VN as much as possible (especially in my case as I am using .NET so that I can run Godot Ink), and so these considerations truly help keep the file size down. Yes, we are living in the age of certain games being 150GB to install, but optimisation can’t be considered a bad thing.
For interface exports, I directly extract them from Figma as PNG files. If I feel their file size is still too big, I manually convert them to WebP using Photoshop’s Save a Copy function, which lets you save out a file as a WebP.
Up next
With artwork done and out of the way, the next thing to tackle is polishing the game, exporting it as an .exe, and finally looking to the future for extra bits and pieces that might be added to the game later. I’ll also cover the distribution of the visual novel on itch.io.
The rest of the series:
→ Part 1: Overview
→ Part 2: Building the VN System
→ Part 3: Art and Design
→ Part 4: Exporting the game


